How to Make Stickers from Photos: Digital and Printed Stickers
Learn how to make stickers from photos: cut out the subject as a transparent PNG, add a white border, then use it in chat apps or print it on sticker paper.
5 min read
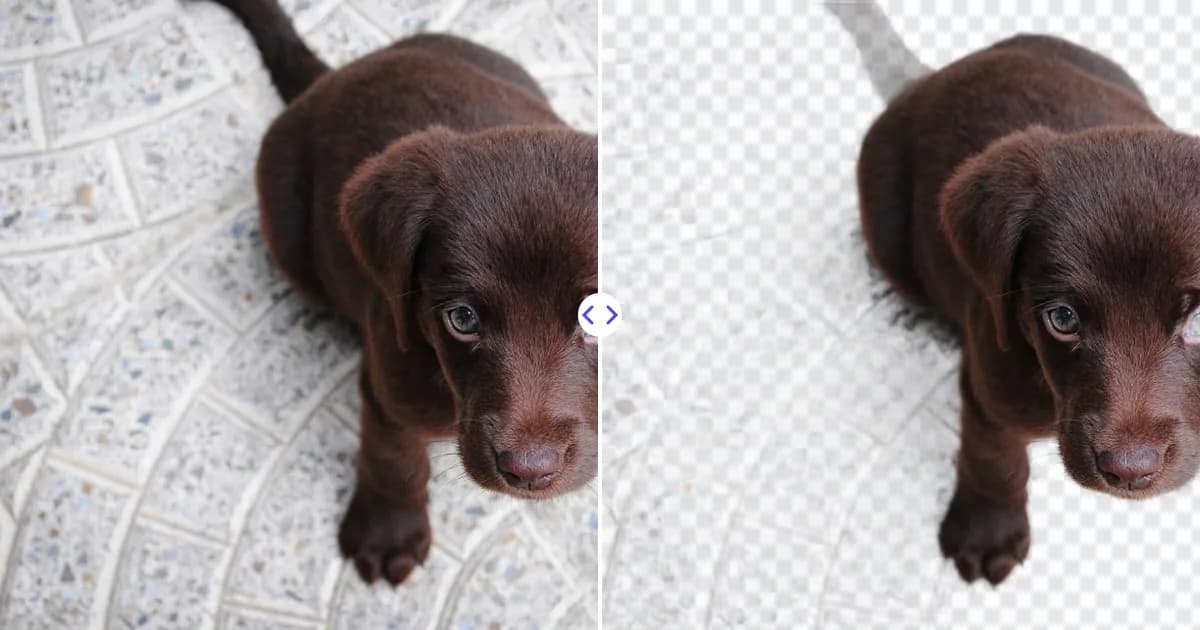
To make a sticker from a photo, cut out the subject so it sits on a transparent background, add a white or colored outline around it, and save it as a PNG. You can then use that file as a digital sticker in messaging apps and social media, or print it on sticker paper and cut along the outline.
The process takes a few minutes and works for pets, people, products, food, logos and almost anything else with a clear shape.
Choose a good photo
Stickers are usually viewed small, so the subject needs a clear, recognizable outline. Look for photos where:
- The subject is fully visible, not cropped by the edge of the frame.
- There is contrast between the subject and the background.
- The image is sharp, especially around the edges.
- The expression or pose reads well even at thumbnail size. Funny faces and bold poses make the best stickers.
If you are taking a new photo specifically for a sticker, our tips on taking photos that are easy to cut out will help you get clean edges from the start.
Step 1: Remove the background
Upload the photo to our free background remover. The AI finds the subject automatically, whether it is a dog, a friend, a coffee cup or a hand-drawn doodle, and returns a PNG with a transparent background. Download the PNG and keep it in that format, because transparency is what makes it a sticker rather than a rectangle. Read what is a transparent PNG if you want to understand why the format matters.
If something unwanted overlaps the subject, such as a leash or a stranger's hand, paint it out with the object remover before cutting out the background.
Step 2: Add a sticker border
The classic sticker look comes from a thick white outline that follows the shape of the subject. It separates the sticker from whatever it is placed on and, for printed stickers, gives you a margin for cutting.
In Photoshop
- Open the transparent PNG.
- Double-click the layer to open Layer Style and choose Stroke.
- Set Position to Outside, Color to white and Size to a value that looks right, often 10 to 30 px depending on image size.
- Optionally add a subtle Drop Shadow for depth, then export as PNG.
In GIMP
- Open the PNG and use Layer > Transparency > Alpha to Selection.
- Grow the selection with Select > Grow by the border width you want.
- Create a new layer beneath the subject, fill the selection with white, and export as PNG.
In Canva and similar apps
Many design apps offer an outline or shadow effect for uploaded images. Upload the transparent PNG, select it, and look for an outline, glow or shadow effect that you can set to white with no blur. Feature names vary between apps and change over time, so check the current options in your tool.
Step 3: Use it as a digital sticker
Digital stickers are simply transparent PNG or WEBP images. Common ways to use them:
- Messaging apps: WhatsApp and Telegram support custom stickers. Each app has its own size and format requirements, often a square canvas such as 512 × 512 px, so check the current guidelines of the app you use.
- Social media stories: Instagram and other apps let you add images from your camera roll on top of a story.
- Presentations and documents: Drop the PNG into PowerPoint, Google Slides or Word for a fun visual.
- Design projects: Use stickers in collages, invitations, thumbnails and scrapbook pages.
To fit a square sticker canvas, place your PNG on a transparent square canvas and leave a small margin around the outline so it is not clipped.
Small details disappear at sticker size, so preview your sticker at the size it will actually be seen. If the subject becomes hard to recognize, crop tighter before removing the background, for example using just your pet's head instead of the whole body. A thicker outline and a simple pose also help a sticker read clearly in a busy chat. Keep a full-resolution copy of every sticker file so you can resize it later for a different app or for printing without starting over.
Step 4: Print physical stickers
For printed stickers at home, you need sticker paper suitable for your printer (inkjet or laser), a printer, and scissors or a cutting machine.
- Check resolution. Printing generally needs more pixels than screens. A common guideline is around 300 pixels per inch at the final print size, so a 2-inch sticker needs about 600 px across. If your cutout is too small, enlarge it with the image upscaler. Our guide on preparing images for print explains this in detail.
- Lay out a sheet. Place several stickers on a page in a document or design app at the exact size you want, leaving space between them.
- Do a test print on plain paper to check sizes and colors.
- Print on sticker paper using the paper type setting recommended by the manufacturer.
- Cut along the white border with scissors or a craft knife. Cutting machines such as Cricut or Silhouette can cut along the outline automatically using their print-then-cut workflow.
- Protect them with clear laminate sheets if they will be handled a lot or exposed to water.
Ideas for photo stickers
- Your pet's face for chats with family.
- Product cutouts as stickers for packaging and thank-you notes.
- Logo stickers for laptops and merch. See how to make a logo transparent.
- Kids' drawings photographed and turned into stickers.
- Travel souvenirs, food photos and inside jokes.
Before making stickers of other people, ask for their permission, especially if you plan to share or sell them. Do not turn copyrighted characters or other people's artwork into stickers for sale without permission.
Make your first sticker
Pick a photo with a clear subject, remove the background for free, add a white outline in your favorite editor, and you have a sticker ready for your chats or your printer. Once you have the transparent PNG, the same file works for both digital and printed versions.