How to Remove a Picture Background in PowerPoint and Word
Step-by-step instructions for removing a picture background in PowerPoint and Word, refining the selection, and saving the result as a transparent PNG.
5 min read
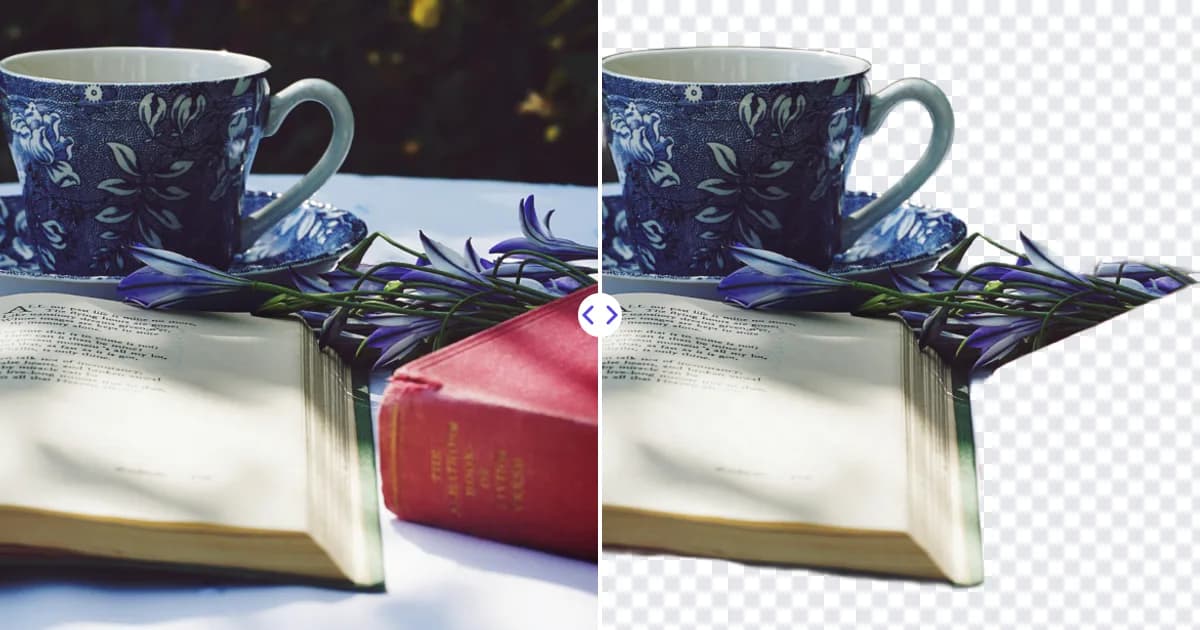
To remove a picture background in PowerPoint or Word, select the picture, open the Picture Format tab and click Remove Background. Office highlights the areas it plans to remove, you adjust them with Mark Areas to Keep or Mark Areas to Remove, and then click Keep Changes. It is a handy built-in tool for slides and documents, although photos with complex edges may need a dedicated AI background remover.
Remove a background in PowerPoint
These steps apply to the desktop versions of PowerPoint for Windows and Mac. Menus can look slightly different depending on your Office version.
- Insert the picture via Insert → Pictures, or paste it onto a slide.
- Select the picture. The Picture Format tab appears on the ribbon.
- Click Remove Background, usually at the far left of the Picture Format tab.
- PowerPoint marks the areas it will remove in magenta. Everything in its original color will be kept.
- If parts of your subject are magenta, click Mark Areas to Keep and draw over them. If parts of the background are still visible, click Mark Areas to Remove and draw over those.
- Click Keep Changes, or simply click outside the picture.
You can return to Remove Background at any time to adjust the result, because Office keeps the original image inside the file. If you want to start over, use Discard All Changes.
Tips for refining the selection
- Zoom in first. Use the zoom slider in the lower-right corner so you can see small details while marking areas.
- Draw short lines, not outlines. Mark Areas to Keep and Mark Areas to Remove work best with quick strokes across a region; you don't need to trace the edge precisely.
- Crop before removing. Cropping away most of the background first gives Office less to analyze and usually produces a better initial guess.
- Fix one area at a time. After each stroke, PowerPoint recalculates the selection, so check the result before adding more marks.
- Undo freely. Ctrl+Z (Cmd+Z on Mac) removes the last mark if a stroke makes things worse.
Remove a background in Word
Word uses the same tool:
- Insert the picture into your document.
- Select it and open the Picture Format tab.
- Click Remove Background and refine with Mark Areas to Keep and Mark Areas to Remove.
- Click Keep Changes.
To position the cutout freely over text or shapes, change its text wrapping (Layout Options → In Front of Text or Behind Text).
Make one color transparent with "Set Transparent Color"
For logos and graphics on a solid background, there is a quicker option:
- Select the picture and open the Picture Format tab.
- Click Color and choose Set Transparent Color.
- Click the color you want to remove, such as the white background.
This makes every pixel of exactly that color transparent. It works well on clean, computer-generated graphics, but on photos or compressed JPGs the background is rarely a single exact color, so you may see speckles or a halo. It can also remove matching colors inside your subject, such as white text in a logo. Our guide on how to make a logo transparent has better options for logos.
Save the cutout as a transparent PNG
Removing a background in Office changes how the picture displays in that file. To reuse it elsewhere, export it:
- Right-click the picture.
- Choose Save as Picture.
- Select PNG as the file type and save.
PNG keeps the transparency; saving as JPG fills the removed area with a solid color. For more on formats, see PNG vs JPG vs WEBP.
Limitations of Office's Remove Background tool
The tool is convenient but basic compared with dedicated software:
- Rough edges. Hair, fur and soft outlines often look cut out or jagged, because the tool has limited support for soft, partially transparent edges.
- Manual cleanup. Busy backgrounds can require many Mark Areas strokes.
- Low-contrast subjects. Subjects that blend into their background are often partly removed.
- Feature availability varies. Web and mobile versions of Office may not offer the same tools as the desktop apps.
A cleaner alternative: remove the background first, then insert
For portraits, product photos and pets, you will often get a better result by removing the background before the image goes into your slide or document:
- Upload the photo to Remove Photo Bg's background remover (JPG, JPEG, PNG or WEBP, up to 16 MB).
- The AI detects the subject automatically, including fine edges such as hair.
- Download the transparent PNG.
- Insert it into PowerPoint or Word via Insert → Pictures. It will already have a transparent background.
This works in any modern browser, needs no Office add-ins, and processes images on Remove Photo Bg's own servers rather than third-party AI services. If you want to know why AI tools handle edges differently, read how AI background removal works.
Design ideas for slides and documents
Once your subject has a transparent background, you can do far more with it than with a rectangular photo:
- Team pages: place every headshot on the same brand color for a consistent look.
- Product slides: put products on a clean background with a soft shadow (Picture Format → Picture Effects → Shadow).
- Title slides: let a person or object overlap the headline text for depth.
- Reports and proposals: wrap text around the subject's outline rather than a box.
- Logos: place a transparent logo on colored headers and footers without a white box.
Troubleshooting
The Remove Background button is grayed out
Make sure you have selected a picture, not a shape, icon or SVG graphic. The tool works on raster images such as JPG and PNG. Grouped objects may need to be ungrouped first.
Part of the subject keeps disappearing
Use Mark Areas to Keep and draw short strokes across the missing area. If it still fails, remove the background with an AI tool and insert the PNG instead.
The image looks blurry after resizing
Small source images lose sharpness when enlarged on a slide. Enlarge them 4× with the AI image upscaler before inserting.
Get a cleaner cutout for your next presentation
PowerPoint and Word's Remove Background is perfect for quick edits on simple images. For natural edges on people, pets and products, remove the background with Remove Photo Bg first, then drop the transparent PNG into your slide or document.